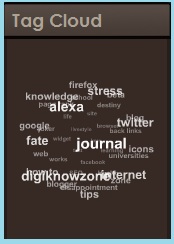
 Some of you might have noticed some blogs that have animated revolving tag clouds just like this:
So, what do I need that for? It's a good way for your readers to search for your blog posts according to their respective categories. I think this also reduces your site's bounce rates.
You'll also learn how you could modify it's dimensions so that you could fit it in your sidebars. Again, since I'm a using blogger, I'll be telling you how you could this through your blogger account. So here we go!
1. As all of the basics, login to your blogger account.
2. Go to your 'Design' tab, then click on the 'Edit HTML' sub-tab. Just to be safe, backup your
files by clicking on 'Download Full Template'. Once done, tick on the 'Expand Widget Template'.

3. Now, scroll down and look for this tag:
<b:section class='sidebar' id='sidebar' preferred='yes'>TIP: If your having trouble finding it through scanning, try hitting on Ctrl+F and search for it.
4. Add this code right after the code in the number 3 step.
<b:widget id='Label99' locked='false' title='Labels' type='Label'>
<b:includable id='main'>
<b:if cond='data:title'>
<h2><data:title/></h2>
</b:if>
<div class='widget-content'>
<script src='http://sites.google.com/site/bloggerustemplatus/code/swfobject.js' type='text/javascript'/>
<div id='flashcontent'>Blogumulus by <a
href='http://www.roytanck.com/'>Roy Tanck</a> and <a
href='http://www.digiknowzone.blogspot.com'>Digiknowzone</a></div>
<script type='text/javascript'>
var so = new
SWFObject("http://sites.google.com/site/bloggerustemplatus/code/tagcloud.swf",
"tagcloud", "240",
"300", "7",
"#ffffff");
// uncomment next line to enable transparency
//so.addParam("wmode", "transparent");
so.addVariable("tcolor", "0x333333");
so.addVariable("mode", "tags");
so.addVariable("distr", "true");
so.addVariable("tspeed", "100");
so.addVariable("tagcloud",
"<tags><b:loop values='data:labels'
var='label'><a expr:href='data:label.url'
style='12'><data:label.name/></a></b:loop></tags>");
so.addParam("allowScriptAccess", "always");
so.write("flashcontent");
</script>
<b:include name='quickedit'/>
</div>
</b:includable>
</b:widget>TIPS:
A. You can change the size of the gadget by looking for these codes:
The 240 is the height and 300 is the width. Since we all have different blog templates and sidebars, you'll probably have to do this."240", "300"
B. You can check the background color and text color so that it would match your site's color scheme. Just look for this code:
#ffffff"C. You can also change the font size by looking for this code:
7"D. For the text color, look for this code:
0x333333"Once you've made the changes, click on the 'Save Template' button.
E. You can also change the position of your gadget/widget by going to your blogger's 'Design' tab and the 'Page Element' subtab. And drag it accross or wherever you want it.
Also, your tag cloud would appear crowded, since all of your blog tags are in there, so what you need to do is change it. Here are the steps:
- In the 'Page Elements' sub tab, look for your Label or Tag Cloud gadget and click on 'Edit'

- A pop-up window will appear. The code I've provided you will have a gadget/widget title of 'Labels' you can change it to whatever you like. Now, I mentioned that your label will be crowded, since the default setting was set to 'All Labels'. Now, change it to 'Selected Labels'. Click on the 'edit' link to choose the labels you want to appear in your cloud.


- Hit on the 'Save' button again. And your done!
Enjoy using your Tag Clouds in your own Blogger blogs! Please feel free to share or syndicate this page with your favorite bookmarking service if you think it is worth a mention, or subscribe to the newsfeed to learn of more great tutorials as they are posted.


